My children’s school uses the 1Core Family app to share photos. The iOS app lets me save a photo at a time, but I could not find a bulk export in the app or the parent website. After a little investigation, I exported 5,502 photos and videos from three galleries and restored their available gallery dates.
This post documents the workflow while it is still fresh in my mind.
This is an independent, unofficial guide and is not affiliated with or endorsed by 1Core Solution. Use it only for personal archival of media you are authorized to access through your own account, and do not redistribute photos without permission. The workflow relies on an undocumented API and a Charles capture containing live authentication credentials. Never upload or share the capture, its headers, or signed URLs, and do not use it to access another account or evade access restrictions. 1Core’s terms, app behavior, and your childcare provider’s policies may differ or change. All screenshots below are sanitized.
My export at a glance
| File count | Download size | |
|---|---|---|
| Photos | 4,954 | 23.09 GB |
| Videos | 548 | 21.74 GB |
| Total | 5,502 | 44.84 GB |
The available gallery dates span just over three years, from July 3, 2023 through August 3, 2026.
Availability note (August 14, 2026): My account returned gallery media back to July 3, 2023, but nothing earlier. Availability may differ by account or change over time.
Why the web login was not enough
The parent website and iOS app use different authentication mechanisms. I did not find a gallery API call or token exchange in the signed-in web portal, so I captured one request from the iOS app and replayed it locally. The individual signed media URLs expired after roughly 30 minutes.
What you need
- A Mac and iPhone on the same Wi-Fi network
- The current version of Charles Proxy
- The 1Core Family iOS app, signed in to your account
- Enough local disk space for the gallery
- My 1Core gallery tools, which read a private Charles session without printing the captured credentials and can apply fallback dates to a separate copy
- Optional: ExifTool for restoring dates after download
Use the latest Charles release. My first attempt used an old Intel-only build that could no longer complete the API’s modern TLS handshake.
A note about the trial: Charles is paid software with a free trial. In trial mode, startup may pause for about 10 seconds, and Charles may require a restart after roughly 30 minutes. That is still enough time to capture and save one gallery request; the downloader does not need Charles afterward, provided the captured authorization remains valid.
1. Start Charles without proxying the Mac
Launch Charles. It may offer to install its macOS proxy helper.
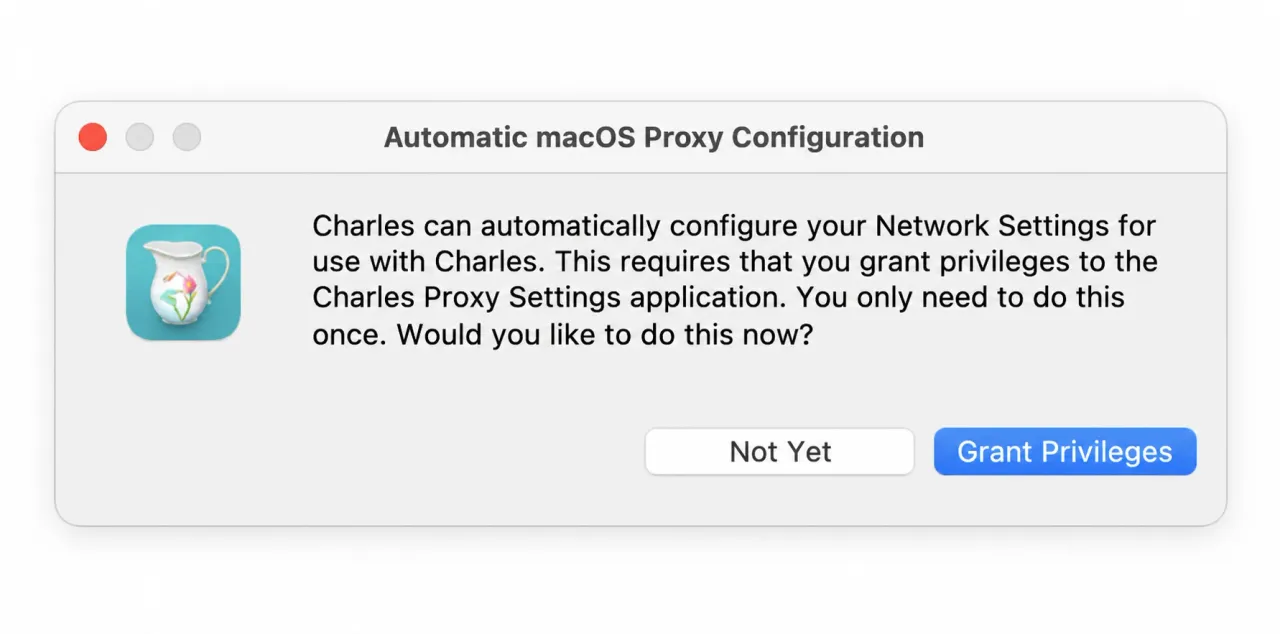
For this workflow, click Not Yet. The iPhone will be configured manually, and the Mac itself does not need to send its traffic through Charles. This also avoids leaving macOS pointed at a proxy that is no longer running when Charles quits.
Charles normally listens on port 8888. You can confirm this under Proxy → Proxy Settings.
2. Allow the iPhone to connect
Keep the Mac and iPhone on the same Wi-Fi network. Temporarily disable a VPN if it prevents devices on the local network from reaching one another.
In Charles, open Proxy → Access Control Settings. I left Prompt to allow unauthorized connections enabled and approved only my iPhone when it connected.
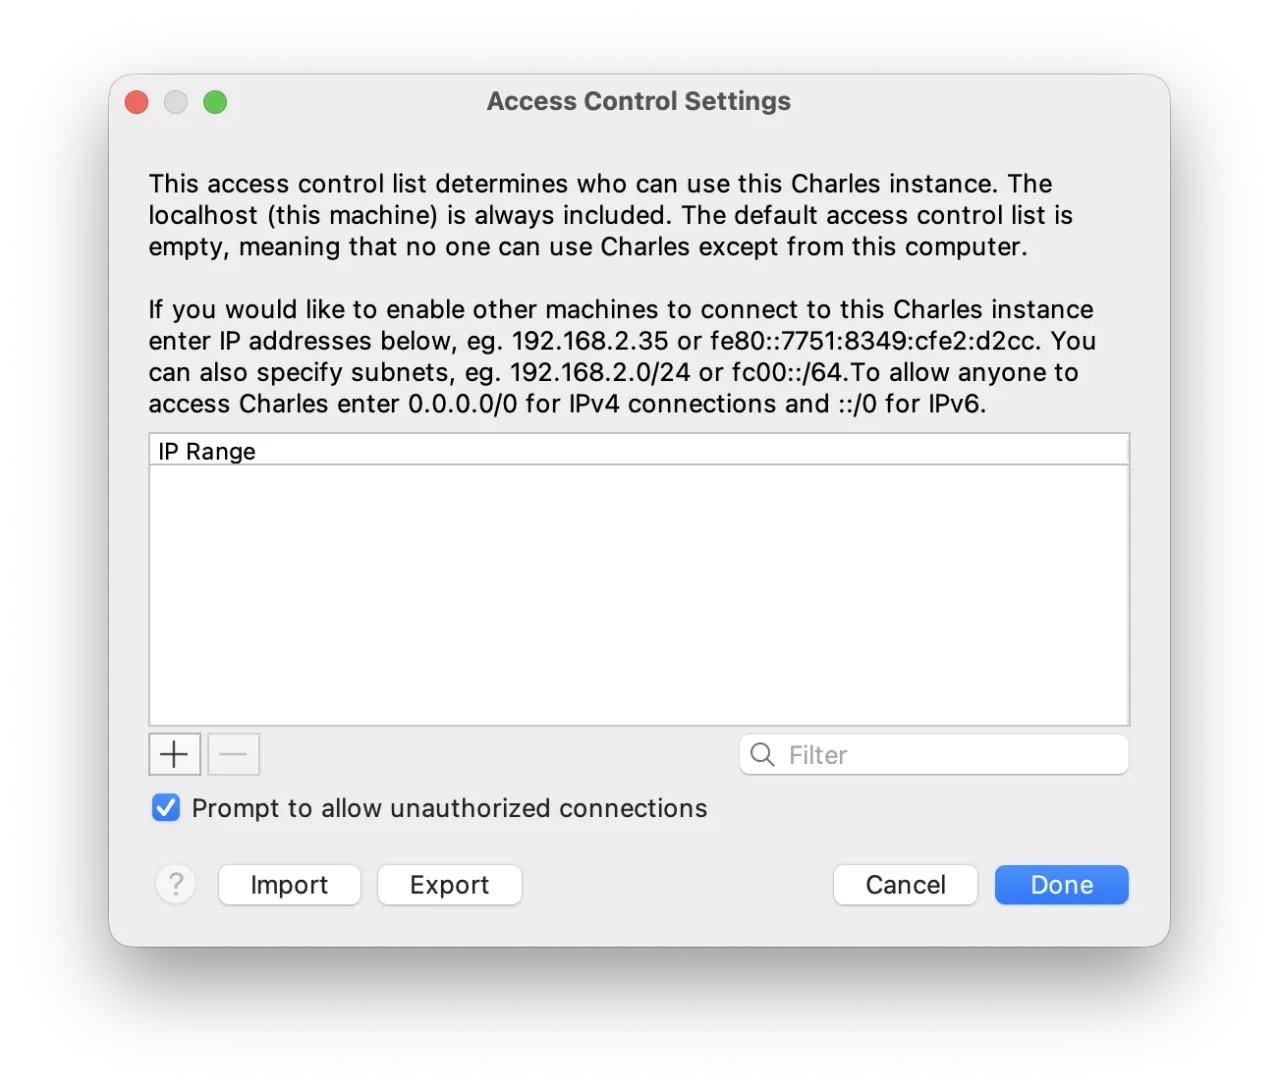
Do not add 0.0.0.0/0; that would allow any reachable device to use your proxy. If you prefer an explicit rule, add only the iPhone’s local IP address.
Find the Mac’s Wi-Fi IP address in System Settings → Network → Wi-Fi → Details → TCP/IP. It will usually look like 192.168.x.x or 10.x.x.x.
3. Point the iPhone at Charles
On the iPhone:
- Open Settings → Wi-Fi.
- Tap the information button beside the current network.
- Scroll to Configure Proxy.
- Choose Manual.
- Enter the Mac’s Wi-Fi IP as Server.
- Enter
8888as Port. - Leave authentication off and save.
Charles’s official iPhone instructions cover the same setup.
If Charles asks whether to allow a new connection, verify that the address matches the iPhone and approve it.
4. Install and trust the Charles certificate
The proxy can see encrypted API requests only if the iPhone trusts Charles’s temporary certificate authority.
- With the manual Wi-Fi proxy still enabled, open Safari on the iPhone.
- Visit https://chls.pro/ssl.
- Allow the configuration profile to download.
- Open Settings → General → VPN & Device Management and install the Charles profile.
- Open Settings → General → About → Certificate Trust Settings.
- Enable full trust for the Charles certificate.
These are also the steps in Charles’s official SSL certificate documentation.
5. Decrypt only the 1Core API
In Charles, open Proxy → SSL Proxying Settings:
- Enable SSL Proxying.
- Add one Include location.
- Set the host to
api.1core.comand the port to443.
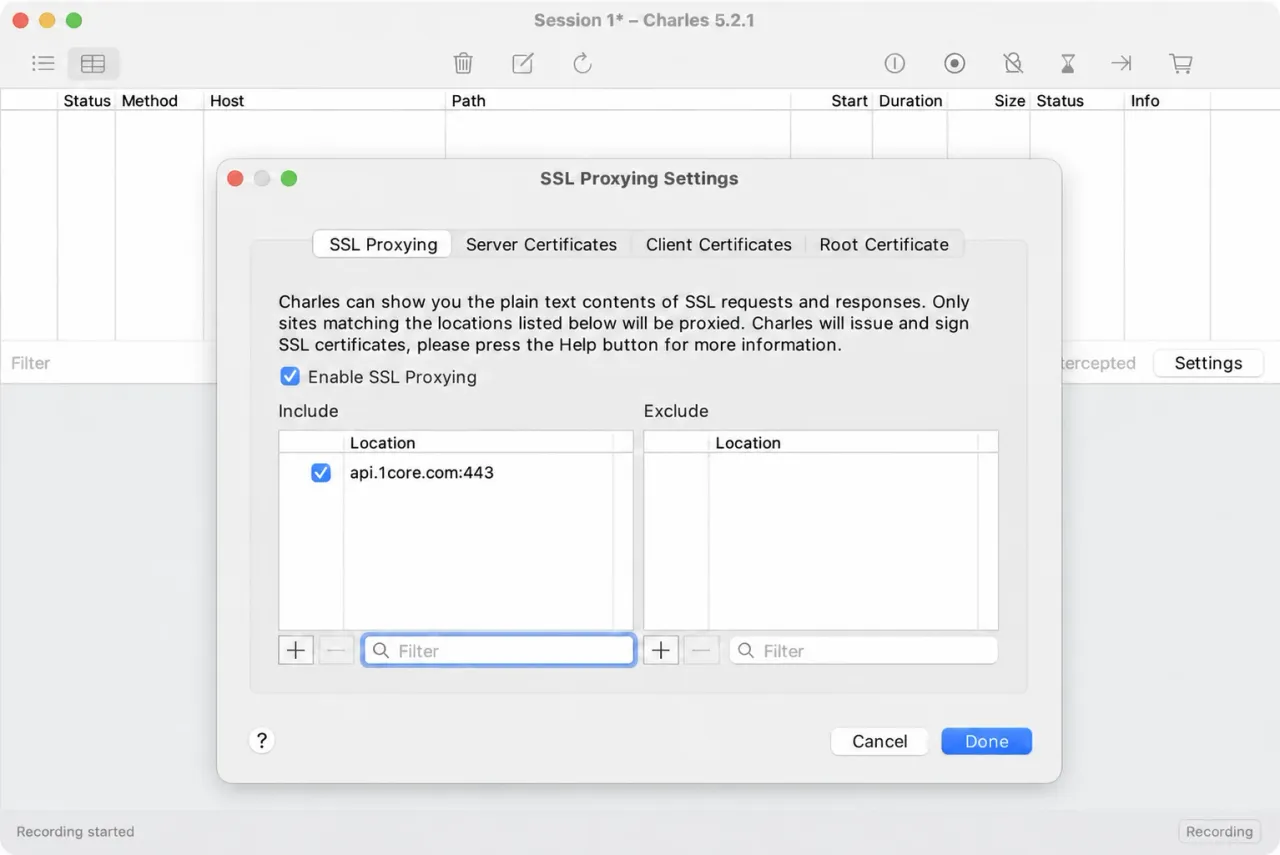
Avoid a wildcard such as *. It captures far more private phone traffic than this job needs.
6. Capture one gallery request
Clear the current Charles session, make sure recording is active, and then:
- Open the 1Core Family app.
- Open the child’s Gallery.
- Pull down to refresh or open the newest photo.
- Return to Charles and filter for
1core.
A successful capture should contain api.1core.com; media downloads may also appear under content.1core.com.
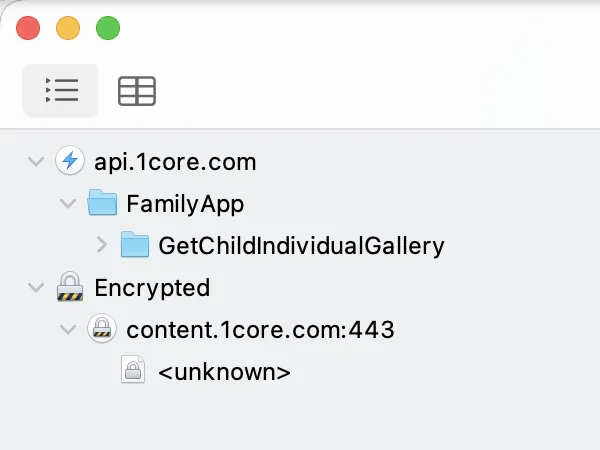
Under api.1core.com, look for a successful POST request to:
/FamilyApp/GetChildIndividualGallery/The request headers contain the three app credentials, and the JSON request body contains the center, family, and child identifiers. Do not copy any of those values into a blog post, issue, chat, or public script.
Save the Charles session to a private .chls file and stop recording. A safer downloader reads the required values directly from that file without printing them. If you inspect or copy the request manually, remember that command-line arguments and shell history are not good places for credentials.
7. Download the gallery page by page
Download 1core-download.py from the gist, then run it with the private Charles session and a new output folder:
chmod 600 capture.chls
python3 1core-download.py capture.chls '1Core Gallery'
The script uses only Python’s standard library. It reads the newest successful gallery request from the capture, downloads every page, resumes interrupted transfers, refreshes expired media URLs, and writes date-index.csv and manifest.json without storing credentials or signed URLs. It preserves the captured center, family, and child identifiers rather than relying on somebody else’s example IDs. It was inspired by northnose’s original shell-script gist and updated for the current api.1core.com endpoint and Charles session format.
8. Restore photo dates
Many downloaded JPEGs had UUID-like filenames and no useful EXIF date. The API’s PhotoDateTime is the date 1Core uses to group the item in its gallery. It may be an upload or posting time rather than the moment the camera took the photo, so preserve any existing camera metadata and treat the gallery timestamp as a fallback.
Of the 5,502 exported records, 5,457 included PhotoDateTime. The remaining 45 were photos, which I left unchanged rather than guessing.
Download apply-1core-dates.py from the same gist, then give it the downloaded gallery and a new output folder:
python3 apply-1core-dates.py '1Core Gallery' '1Core Gallery dated'The script copies the gallery first, then adds fallback EXIF or QuickTime dates only to files without an embedded capture date. The original downloads remain untouched. By default, a gallery timestamp without an offset uses the Mac’s current timezone; pass an IANA name such as --timezone America/Los_Angeles if the gallery belongs in another timezone. Validate a sample with exiftool '1Core Gallery dated/photo.jpg', and keep the originals until the Photos import is verified.
9. Clean everything up
Do not leave the phone proxy or trusted certificate enabled after the capture.
- On the iPhone, return to Settings → Wi-Fi → Configure Proxy and choose Off.
- Remove the Charles profile under Settings → General → VPN & Device Management.
- Confirm the Charles certificate no longer appears under Certificate Trust Settings.
- Quit Charles.
- Re-enable your VPN if you disabled it.
- Delete the
.chlscapture, cached signed URLs, request JSON, and any file containing the private headers after the download is verified.
Troubleshooting checklist
Safari says the server cannot be found
The iPhone cannot reach the Mac. Check the Wi-Fi network, Mac IP, port, access-control prompt, firewall, and VPN.
Charles shows only CONNECT tunnels
Enable full trust for the Charles certificate and add api.1core.com:443 to SSL Proxying.
The app stops loading after Charles quits
Turn the iPhone’s Wi-Fi proxy off.
The Mac stops loading pages after Charles quits
Disable the Mac’s Charles proxy settings; the iPhone-only workflow does not need them.
The API works but photo downloads return 403
The signed media URLs expired. Fetch a fresh API page and retry those files.